Django Stripe Integration with using dj-stripe
June 11, 2020
I had the opportunity to examine dj-stripe while I researching which payment libraries used in Django projects. If you are going to integrate a payment system to your project, you may want to have features such as subscription management or Single-unit purchases. Especially subscription management quite important and time consuming subject for SaaS projects. dj-stripe takes care of these.

Prerequisites:
Before starting to implementation of dj-stripe, make sure that you have requirements below.
- A Django project (Django >= 2.2)
- Python >= 3.6
- Ready to use Stripe account
- A Django project
Installation
First of all, you should install dj-stripe with pip
pip install dj-stripe
then we’re adding djstripe to INSTALLED_APPS
INSTALLED_APPS =(
    ...
    "djstripe",
    ...
)
Add to urls.py
path("stripe/", include("djstripe.urls", namespace="djstripe"))
Stripe Settings
Webhooks
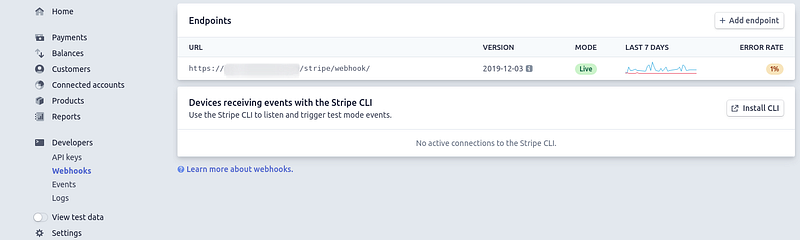
You need to add your webhook address to Stripe. Your webhook address should be like https://domain.com/stripe/webhookYou can find webhook endpoints Developers > Webhooks in Stripe Dashboard. After you create a webhook endpoint in Stripe dashboard, get your webhook secret key which is starting with whsec_
API Keys
/apikeys](https://cdn-images-1.medium.com/max/800/1*oUnYHLLYosP86SeH-zlf5w.png)
Take your Stripe public and secret keys in Developers > API Keysthen add them to your .env file. Your settings.py file should be like:
STRIPE_LIVE_PUBLIC_KEY = os.environ.get("STRIPE_LIVE_PUBLIC_KEY", "<your publishable key>")
STRIPE_LIVE_SECRET_KEY = os.environ.get("STRIPE_LIVE_SECRET_KEY", "<your secret key>")
STRIPE_TEST_PUBLIC_KEY = os.environ.get("STRIPE_TEST_PUBLIC_KEY", "<your publishable key>")
STRIPE_TEST_SECRET_KEY = os.environ.get("STRIPE_TEST_SECRET_KEY", "<your secret key>")
STRIPE_LIVE_MODE = False
DJSTRIPE_WEBHOOK_SECRET = "whsec_xxx"
dj-stripe will use your test keys while STRIPE_LIVE_MODEisfalse
Plans
Let’s create a plan. Click Product button on sidebar.
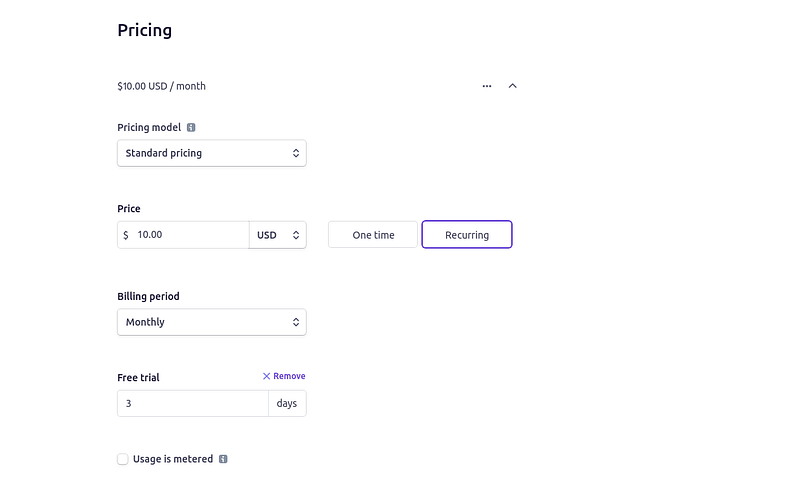
Name field is required. I created a recurring plan with 3 days free trial.
Run these commands to create dj-stripe tables, initialize exists customers on stripe and migrate created plans from Stripe to our dj-stripe tables.
python manage.py migrate

python manage.py djstripe_init_customers

python manage.py djstripe_sync_plans_from_stripe
Events
I need to talk about Stripe events as well. Stripe has different lots of event. You should specify which events do you want to listen from API. You may send an e-mail to customer when checkout failure or you may want to remind your customer that the subscription will end in x days. In these cases, you will choose your events that you want to listen on Stripe dashboard and you should implement a listener method for each.
Choose your events in Developer > Webhookspage.
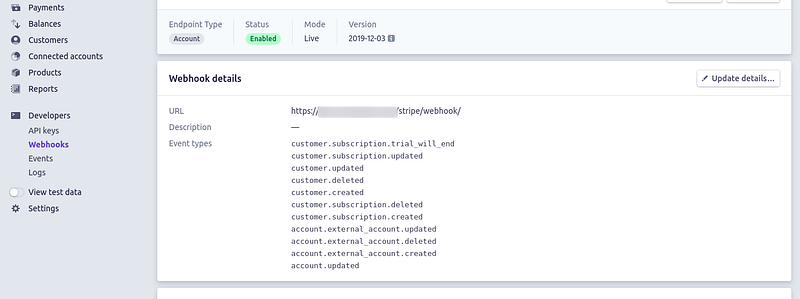
Let’s create an endpoint for customer deleted event.
from djstripe import webhooks
from django.core.mail import send_mail
@webhooks.handler("customer.deleted")
def customer_deleted_event_listener(event, **kwargs):
    send_mail(
    'Subscription Deleted',
    'See ya! 👋',
    'from@example.com',
    ['to@example.com'],
    fail_silently=False,
)
You can find customer info’s inside event variable.
Checkout
I prefer Stripe Checkout which means customer will pay on stripe.com domain. But you can implement it on your client application.
Checkout creates a secure, Stripe-hosted payment page that lets you collect payments quickly. It works across devices and is designed to increase your conversion.
More info : https://stripe.com/docs/payments/checkout
In Stripe Checkout way; If you implementing a SaaS application API should create a stripe session which has some customer information about checkout step (E.g plan name, customer id)
customer = Customer.objects.get(subscriber=request.user)
stripe.api_key = STRIPE_SECRET_KEY
session = stripe.checkout.Session.create(
       customer=customer.id,
       payment_method_types=['card'],
       subscription_data={
       'items': [{
         'plan': request.data["plan"],
      }],
},
       success_url='http://example.com/success',
       cancel_url='http://example.com/cancelled',
)

data = {
"session_id": session.id
}
return JsonResponse(data, status=200)
After created the session id, deliver it to your client application.
We should import Stripe.js before implementing checkout steps on client.
Add this line to your .html file
<script src="https://js.stripe.com/v3/"></script>
Initialize a stripe object
var stripe = Stripe(YOUR_PUBLIC_KEY);
When customer click “Subscribe Now” button should run piece of code below
stripe.redirectToCheckout({
       sessionId: this.state.session_id
})
.then(function(result) {
    // If `redirectToCheckout` fails due to a browser or network
    // error, display the localized error message to your customer
    // using `result.error.message`.
    var displayError = document.getElementById('error-message');
    displayError.textContent = result.error.message;
});
When customer click the button, they will see this page below
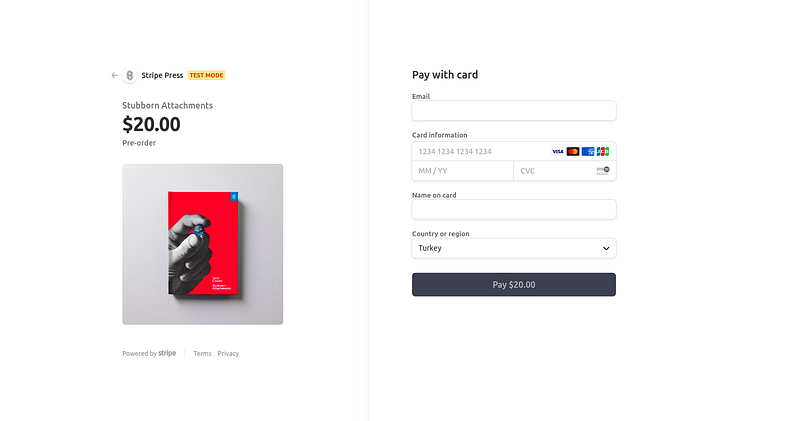
P.S: If you use stripe test keys, page will see in test mode. You can test your checkout step with test card numbers.
- Default U.S. card —
4242 4242 4242 4242 - Authenticate with 3D Secure —
4000 0000 0000 3220
Conclusion:
We’ve created a successful Stripe integration with using dj-stripe project. I tried to keep writing as simple as possible in terms of quick implementation and understandability. Stripe has lots of features with amazing documentation. I suggest you to read it before using Stripe.

Personal blog about my works, thoughts and the technologies I am interested in. Written by Berat Nakip who lives and works in Istanbul. Follow on Twitter